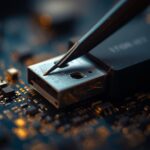










A damaged USB drive can cause panic, especially when it contains your essential work, photos, or school projects. I’ve helped many people face this same issue, and most were surprised to learn they could still repair their USB drives and recover their files. Although it may seem impossible at first, you can often restore access to your data by following a few careful steps.
Through a steady process, you can repair the drive, recover your data, and prevent future problems. With the right tools and a bit of patience, your USB drive can work again like new.
Step 1: Identify the Problem
Before starting any fix, I always identify the root of the problem. Sometimes, the issue is physical, such as a bent connector or a cracked casing. Other times, the problem is logical, meaning the drive’s file system or data structure is damaged.
First, try connecting the USB to another computer or port. If the same issue appears, the drive may be corrupted. On the other hand, if it works elsewhere, the fault might lie in the original device. By determining the true cause early, you can choose the right solution and avoid making the issue worse.
Step 2: Try Basic Troubleshooting
Once you know the type of problem, start with the easiest fixes. For instance, reconnect the USB drive or restart your computer. Often, the system needs a quick refresh to recognize the device.
Next, open Device Manager and check whether your USB appears under “Disk Drives.” If it does, right-click and select Update Driver. Sometimes, reinstalling the driver helps the system communicate properly with the USB. Even though this step seems simple, it can save you from unnecessary repairs later.
Step 3: Use Built-In Repair Tools
If basic troubleshooting doesn’t work, use your computer’s repair tools. Both Windows and macOS include utilities that scan and fix drive errors.
On Windows
- Plug in your USB drive.
- Open File Explorer, right-click your USB, and select Properties.
- Go to the Tools tab and click Check under Error Checking.
On macOS
- Open Disk Utility.
- Select your USB drive.
- Click First Aid, then follow the steps to repair the disk.
These built-in tools often solve logical errors and restore access quickly. As a rule, I always use these before trying third-party programs because they are safer and built into the system.
Step 4: Recover Lost Files
If your files still seem missing, don’t worry. You can often recover them with data recovery software. Tools such as Recuva, EaseUS Data Recovery, or Disk Drill are excellent for scanning and restoring deleted data.
Here’s how I usually do it:
- Install a trusted recovery program on your computer (not on the damaged drive).
- Run a deep scan to detect lost files.
- Review the list of recoverable items and save them to a safe location.
Be sure not to save the recovered files back onto the same USB, as that could overwrite data. With this careful approach, you can usually restore your important files without loss.
Step 5: Reformat the Drive
After recovering your files, you should reformat the USB drive to make it fully functional again. Reformatting removes damaged data and rebuilds the file system.
- On Windows: Right-click your USB drive, choose Format, and select FAT32 or exFAT.
- On macOS: Open Disk Utility, select your USB, and click Erase, then choose the proper format.
Although this step erases existing data, it ensures your USB is clean, stable, and ready for future use. Always reformat only after you’ve safely backed up your files.
Step 6: Prevent Future USB Damage
Once your USB works again, take steps to prevent future issues. In my experience, simple habits make a big difference.
Always eject the drive safely before removing it. Also, avoid plugging it into multiple public or untrusted devices, as that increases the risk of malware. In addition, keep backups of important files on cloud storage or external hard drives. Furthermore, store your USB drives in a dry and cool place to protect them from heat or moisture.
By following these small but effective habits, you’ll reduce the chance of future data loss.
Step 7: Seek Professional Help if Needed
Sometimes, despite your best efforts, your USB drive may still not respond. When that happens, I suggest turning to data recovery experts. They use advanced forensic tools and cleanroom equipment to retrieve files even from severely damaged devices.
Professional help can cost more, yet it’s worth it when the data is critical. I’ve seen many people regain years of lost work because they contacted a recovery specialist instead of trying risky DIY fixes.
Conclusion
Repairing a damaged USB drive doesn’t always mean losing your data. With the right steps, tools, and care, you can restore both the drive and your files. Moreover, by practicing safe habits like ejecting properly and backing up data, you’ll protect yourself from future loss.
In the end, repairing a USB drive is not only about fixing a device, it’s about keeping your digital life safe and secure.